Authentication with Firebase - How!
In my last post we talked about why you would want to use Firebase to handle your app's authentication, and in this post we will dig into how. This is meant to give you quick overview on how to get started, not a full guide. We will be talking in the context of a Node.js / React project environment.
The Firebase Console
First we will need to visit the Firebase console. If you do not already have a Google account, you will need to create one and sign in. Once you have an account and have logged in, you should be able to navigate to the admin console at https://console.firebase.google.com
Once you are in the console, we will want to create a project and run through the creation wizard:
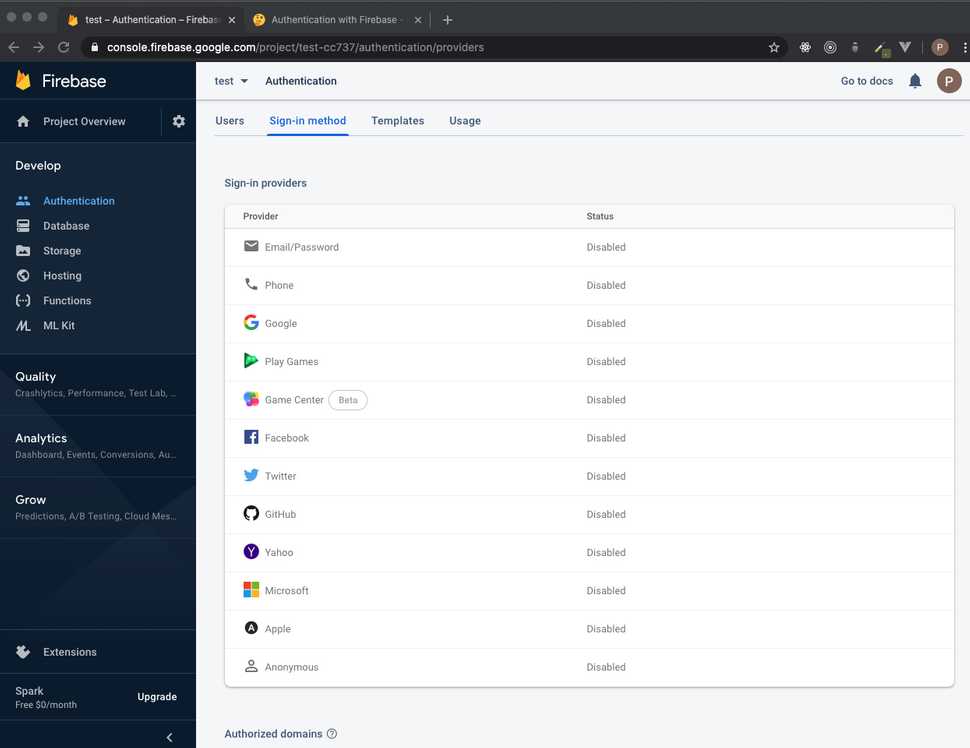
Now that we have our Firebase project created, let's navigate to the authentication area, and look at the sign-in methods:
As you can see, we have multiple sign-in providers to choose from! This is probably my favorite feature of Firebase thus far. The ability to EASILY integrate sign-in's with accounts a user already has. This greatly reduces the barrier of entry to our applications. We want to make it as easy as possible for users to able to use our application, and this is a great way to eliminate a tedious and lengthy registration form.
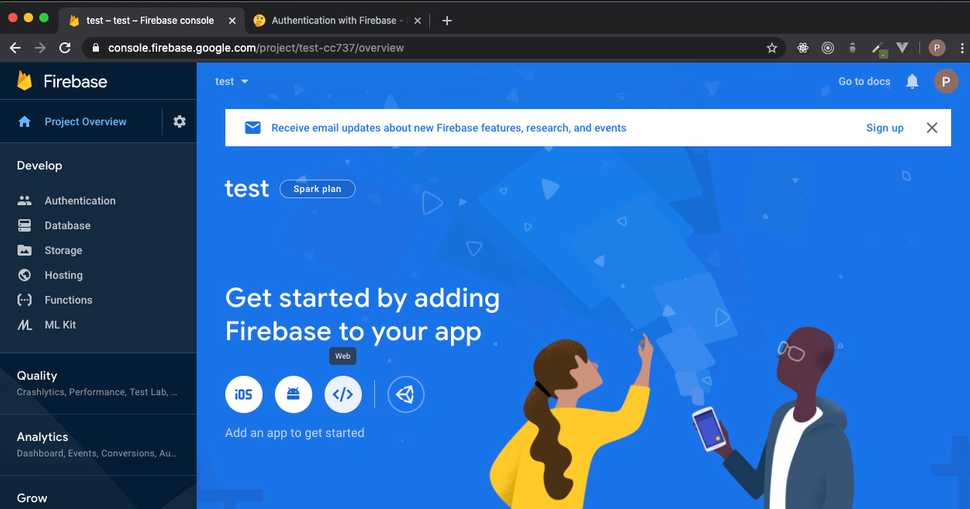
Let's enable the Google sign-in provider, then navigate to our project's home dashboard and register our web app with Firebase:
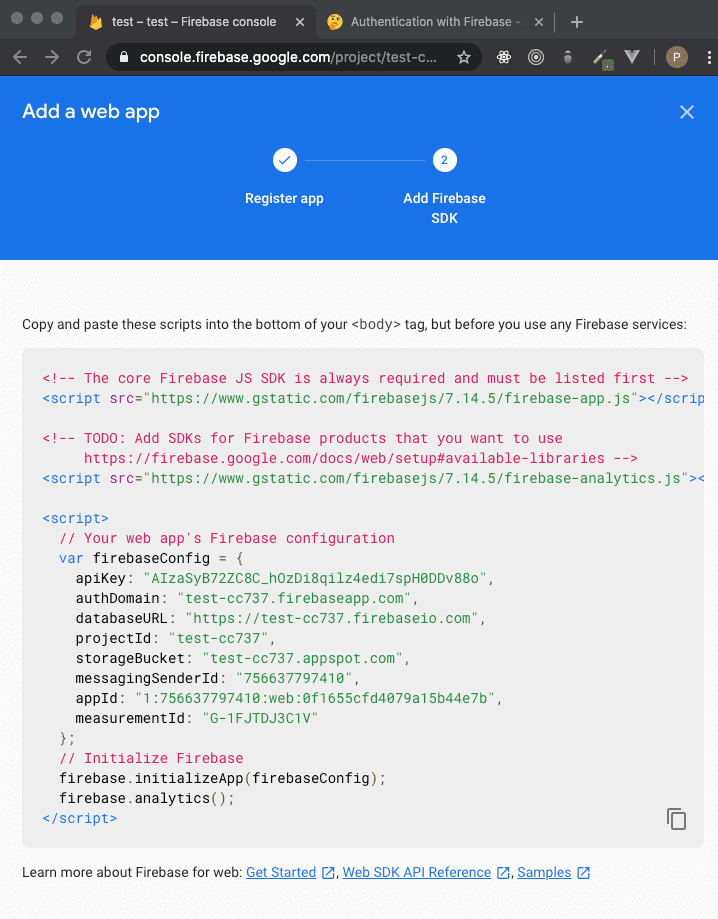
After registration, you will be provided with a code snippet that we will need to use to configure our web application. We only need the object assigned to the variable 'firebaseConfig':
Installing The SDK
Now that we have Firebase configured on the console side, we are ready to install the SDK. Installing the SDK gives us new methods to use in our application that allow us to make specific calls to our new Firebase project. Open up the terminal and navigate to the projects root directory, and then run the command:
npm i firebase
We are assuming you have Node.js installed in your dev environment.
The Code - Firebase Utility
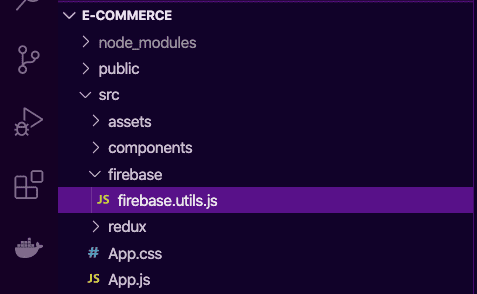
In our React project, let's navigate to the src folder and create a new folder for Firebase. In that folder, we will create a new JavaScript file named firebase.utils.js to house our Firebase config settings.
Now let's dive into connecting our app to Firebase. Import the following from the Firebase SDK into our newly created utility file:
import firebase from 'firebase/app';
import 'firebase/auth';
The above imports allow us to use specific methods provided by Firebase for configuring our application. Remember the config object we set aside? Now here is where it comes into play. We will create a new object called config with this data in it. It should look like the following:
Now let's initialize our app by passing in the config object and calling the following method:
firebase.initializeApp(config);
Next let's export the following method as the variable auth so we can call this method as we need it through out our application:
export const auth = firebase.auth();
We can now configure a couple of options specific to the google sign-in provider we have enabled. We will want to create a variable called provider and set it with the following:
const provider = new firebase.auth.GoogleAuthProvider();
With this new variable, we can now chain on some custom parameters to the provider with the .setCustomParameters() method. We will enforce the Google sign-in pop up for account selection every time we call the user to sign-in with Google:
provider.setCustomParameters({ prompt: 'select_account' });
To wrap up the utility file, we will now create and export a signInWithGoogle function passing in the provider we have just created, and then export Firebase for later use throughout our application:
export const signInWithGoogle = () => auth.signInWithPopup(provider);
export default firebase;
The Code - Sign-in component
Now we just need to bring in our newly created signInWithGoogle function to whatever component you are using to handle sign-ins. In your sign-in component, import signInWithGoogle from Firebase. Which, depending on your projects folder structure; should look close to:
import { signInWithGoogle } from '../../firebase/firebase.utils'
The last step is to now add an onClick listener to the button component that you wish to use for triggering the sign-in with Google pop up.
Congratulations! You have now set up authentication with Google's sign-in provider. Clicking your button will now trigger the pop up and allow users to authenticate with your app by using their existing Google account:
Quick Wrap Up
This guide was only meant to get you started with using third-party authentication. I wanted to show just how easy it is to integrate this feature into your applications. In order to fully leverage this feature in your app, you will need to think about assigning the Google user auth object that is returned on sign-in to your application's state. How you choose to handle this will vary wildly depending on your project's scope and needs. This is why I did not go further with this tutorial. I'll point you towards the official Firebase documentation if you wish to learn more.
https://firebase.google.com/docs
What's next?
My next article will be on how to integrate Stripe's API into your applications so you can securely accept credit card payments. Who doesn't want to monetize their projects???
Stay tuned!


